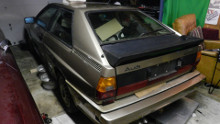
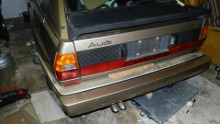
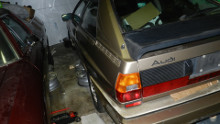
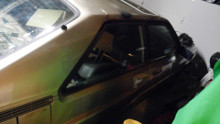
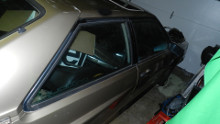
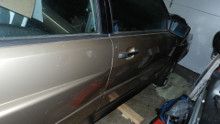
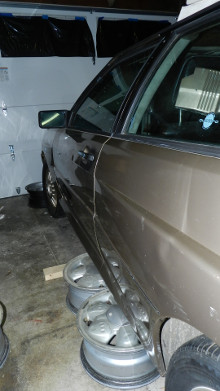
1983 Audi quattro WAUDC0854DA900065
Introduction:
I saw my first ur-quattro in person around 1999 and said I would own one in my life. Little did I know how hard that would be.
Over the next 16 years I had the chance to buy 5 of them. One was in horrible shape, and the owner sold it out without contacting me first which he had said he would. The others were all out of my available purchase funds at the time. As the prices of decent ones have increased, I sadly accepted that I wouldnt have one, and moved on. Isnt it always when youre not looking that one finds you?
Timeline:
Updates: (During my ownership)
June 9, 2011
I purchased my 1984 Tornado Red Audi 4000s quattro from a fellow forum member. Whilst there to pick it up (after flying cross country), he shows me a 1983 Gobi Audi quattro that he has obtained. I briefly look at the car, but tell him I cannot look at it too long as it aches my heart to not have one. I leave shortly there after in the 1984 4000s quattro.December 7, 2014
Said forum member posts that he is looking to possibly sell the quattro due to personal reasons. Because, at the time all I do is hit refresh on most online forums, I was the first to respond to his post. He makes me blush by saying he wouldnt know a better place for the car to go to. He will do a writeup on issues, and get me more in depth pictures than the ones I have since trolled online. He is also not sure he is going to sell it, but wants to get his ducks lined up to shoot with a bb-gun.February 15, 2015
Said forum member contacted me again to inform me that he does in fact need to sell the quattro, and would I be interested? I tried my best to remain calm and say yes.After a few back and forth emails about condition, problems, highlights and all that jazz, we agree on a price and a pickup date.
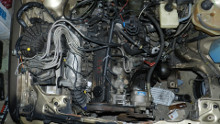
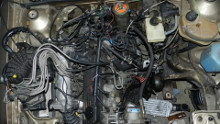
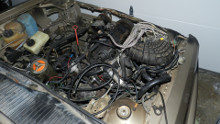
From the seller "Right now, the dialynxed MC1 is in, but needs more nuts & bolts everywhere, wiring is through the firewall but needs to be tied in, theres a lot of nit picky stuff to attend to but overall the car rolled in to the garage complete, the engine was removed complete from my 4kqT, and everything is still here to make one cool Ur-q."
He also gave me a detailed backround on the car.
February 17, 2015
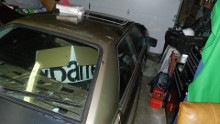
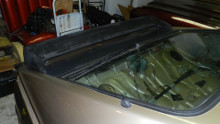
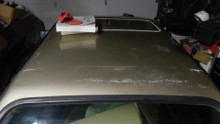
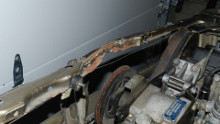
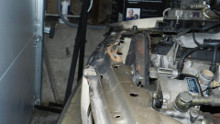
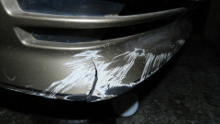
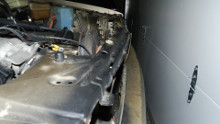
The car was abandoned with the keys left in it (but spark plugs removed, I assume blown head gasket) where it sat until 2006/7. I purchased shortly after from the forum member that originally picked the car up to restore, but realized 1) It had no title, and 2) The block was seized. I towed it home and picked up the 4kqT as a parts bin to get the Ur-q back on the road. While sitting the car did suffer a break in so if you remove the driver side door handle you can see some metal deformation around the hole the handle mounts inside of. The new handle mounted fine and covers the metal damage nicely so no worries there. Right now the car has scratches, small dents, front splitter needs repair. So again, you're getting a project thats every sense of the word, but I have no doubt you can get it on the road relatively quickly, and with some elbow grease have her daily drivable with the dialynxed mc1 currently in place."Some things to note, The gentleman I hired to help install the MC1 refused my warnings of having to install the engine from below, and as such the front cross beam took damage from his carelessness, hood mounting location and overall structure is fine, just aesthetically unpleasing. Any areas of the car that had surface rust from deep scratches were sanded and treated with a black rust prevention spray. Once shes ready to run, she will need a timing belt kit due to age at this point, not mileage. The motor is a mildly tuned MC1 with a dialynx exhaust manifold, UrS6 KKK24 turbo, and comes with both the stock Ur-q intercooler as well as a larger 944turbo style front mount. The ECU was chip tuned by some folks up north, the name of the shop escapes me now but if said you'd know them. When i remember I'll let you know."
"Engine is in, mated to trans with a few hand tightened bolts, and sitting on mustang style density motor mounts. Engine & wiring harness was never seperated so everything is still attached, more or less. entire fuel system to airbox lid still attached, however exhaust isnt mated up yet to downpipe because I need to cut the cat bolts to be able to mat the DP to the motor / turbo, but alas crawling under the car to do so proves to be an impossibility. Wiring loom is tucked through the firewall on passenger side and plugged in to ECU, 3 wires needed to be hooked up to run the whole show (+12vDC, switched +12vDC, ground.) Intercooler plumbing, wire cleanup, cooling system, all need to be reinstalled, though everything included. Cleaning out of original wiring needs to be completed as well. Think of it as the motor has been plopped on to the mounts, and wires fed through the wall to the box, and thats about it. Once I saw the cross beam damage on the car I relieved my friend of his car duties and pretty much gave up on having help. Theres a new spec clutch kit & pressure plate i installed while the motor was out. Alternator and starter will need wiring replaced or hooked back up, a lot of small stuff everywhere needs to be hooked up or bolted down. MC1, dialynx EM, KKK24"s", 944t FMIC, wideband A:F hooked up, 1.8bar chip / spring."
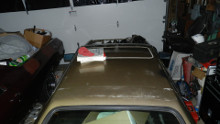
"No front headlights, grill, headlight surrounds, front bumper or hood installed, couple tires need air, and wont hold air for long. Exhaust is sagging low because not connected & the rubber rings are long gone. Dusty. Interior FULL of boxes of parts as well as trunk. Scratches all over the car from when it was abandoned. The boxes of parts are not very well organised (just giving a fair heads up) but I can guarantee you have more then 100% of the parts needed to have a complete example."
"Parts missing to make a 100% complete car:
1) Slanted headlight 85+ upper and lower "eyebrows". Slanted grill included with the later h4/h1's as well as 2 sets of original quad surrounds & flat grills.
2) sunroof headliner. It's a piece of leather thats originally glued to the sunroof. Martin has em for a couple hundred bucks.
3) rear window shelf (carpeted particle board shelf that sits above the back seat). I believe one from a CGT with rear wiper will work.
4) battery ground strap. Just never found one I liked. Currently has nothing but the positive cable leading to battery area."
February 19, 2015
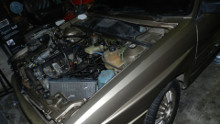
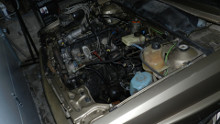
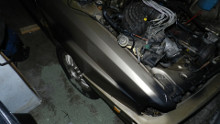
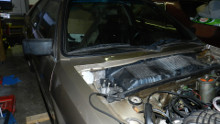
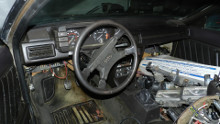
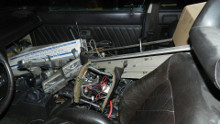
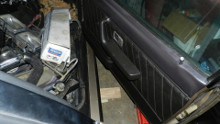
Paperwork has been filed. Pickup date of the weekend of May 8th, 2015! Wahoo!Was sent the following photos by the seller. Tried to highlight all the lowpoints of the car.
Mar 28, 2015
One thing about owning an older Audi is the lack of help and parts from Audi themselves. But thanks to the most wonderful owners on the internet, I have been graced by two superb folks who have sourced me a proper front core support, and a complete, and a lead on a primed set of front and rear A.M. Cars European one piece fiberglass bumpers.The flight has been booked for May 7, 2015 to pick the car up, and a tow service from San Francisco to Portland has been scheduled for pickup on May 7 or May 8. Im starting to get really really anxious.
May 9, 2015
Took a flight down to the car. Met with the owner, exchanged money, signed paperwork, and loaded up a minivan full of 10 years worth of parts.Delivery service had a unexpected delay so it will be picked up next week and brought to me in Portland, OR.
Heres some pics


May 10, 2015
Started to unpack some of the many boxes of spare and new parts that came with the car. Not sure if I am going to keep the H/R's as I will probably be going the coilovers route.
May 22, 2015
After many odd delays, the car was finally delivered today! Yay!! Swapped out the stock Ronals (which I may say are in perfect shape besides some paint failure) for a spare set of Fuchs I had with good tires. Made pushing it around much easier. Once I get the Ronals refinished, I will be refinishing the Fuchs.

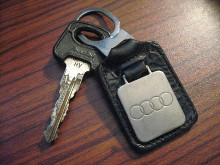
Also digging thru some of the things that came with the car, I came across this keychain and original key. It has a serial number on it that I am going to reach out to audi of america about.. In all the years of internet lurking I have never seen this keychain before.
Pretty awesome!


May 23, 2015
Dove into the car a bit more today. Cleaned up some donor 4kq/80q carpet I was given. The rear urquattro carpet is missing so Im going to swap in the nicer (in my opinion) 4kq/80q carpet.Before and After


I then decided to swap out the hood on my diesel 4k as its already gobi, and i wont have to fully respray it when I get to that point. Now the diesel looks silly with a red/pink hood. But instant 10 horsepower right!?


Moving on, I decided to clean and also inspect and write up anything needed or damaged. The trunk is damn near spotless. Found a few tiny tiny patches of rust, but nothing that needs attention right now. I also found some interesting writing on my tank. But first, I need to get some missing screws, plugs, trunk struts, a new washer bottle, and straighten out the sunroof holder rails.
Also, I cant figure out what the heck the original owner did with this car.. Must have transported a lot of firewood.. Took FOREVER to vac and remove all the woodships out of the fabric.


May 24, 2015
Another day, another list of things done. Although today is more of a teardown day.I wanted to get a good look at the floors of the car, and also prep it for the 4kq carpet swap. I finished off putting the trunk back together and outside of a washer bottle, Im done in the trunk.
Some odd staining on the carpet was confirmed that some brake/clutch fluid has spilled on the carpet before. It has soaked thru the insulation under the carpet, and also really softened up the paint on the floor. Im going to tear into that maybe tomorrow and hope it didnt damage the floor at all.


Score! A door that has never been opened or exposed.

Sadly though I came across some problems. Easy one first, the drivers door is missing a bolt on the check rod assembly. Easy fix. Second, I found a hole in the floor. Looks like someone jacked up the car by the wrong spot and might have caused a stress crack in the floor. Not a horrible fix, and theres no rust from it, so all in all its not that bad.


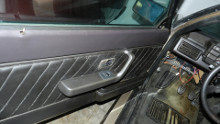
Now onto the interior. Ill let the pics speak for themselves. The rear seats cleaned up nicely after I took photos and the front seats are so/so. Door cards are freaking perfect though!


A little before and after on the door cards. Cleaned and conditioned with leather care. First pass thru and things cleaned up nicely.


June 3, 2015
Havent had much time to do anything. But I did get my trunk sruts in the mail, and also found time to spruce up the spoiler and add some stainless fasteners.
Sept 6, 2015
I have slowly starting to accumulate parts, and plan my rebuild process. Money has been saving up slightly, while parts have been stacking up in great amounts. Also received some new photos from a previous owner and managed to be a total creep (thanks internet!), and find the location of where the car spent a few years sitting outside. Cant wait to get it running so I can revisit this and take some before and after photos :)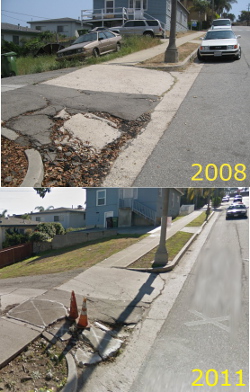
Sept 7, 2015
Swapped out the wheels for the BBS RA 300's from my 5000t. I need to refinish the Fuchs and the tires are constantly going flat, so now seemed like a good time. The BBS RA's are 7x15, 5x112 and et45. With 205/60-15 tires, the clearance is very very tight in the front. The rear seems to have plenty of room. Will def buy me some time while I work on the Fuchs and the stock Ronals..jpg)
.jpg)
.jpg)
.jpg) Took apart my flat h1/h4's to clean my reflectors and glass, and decided to wash the housings in my dishwasher.. Theres a bit of overspray on them from the PO when he was covering up a bit of surface rust. So I may just plastic paint these black.
Took apart my flat h1/h4's to clean my reflectors and glass, and decided to wash the housings in my dishwasher.. Theres a bit of overspray on them from the PO when he was covering up a bit of surface rust. So I may just plastic paint these black.
.jpg)
.jpg)
.jpg)
.jpg) I also took off my front valence to address a crack that was existing. Itll def need a bit of work. And all the mounts are generally shot too. taking a bit more look at the passenger side fender reveals it might need to be replaced too.. The front edge has def been damaged, and all the mounts for the valence seem to be just a tad bit off too.
I also took off my front valence to address a crack that was existing. Itll def need a bit of work. And all the mounts are generally shot too. taking a bit more look at the passenger side fender reveals it might need to be replaced too.. The front edge has def been damaged, and all the mounts for the valence seem to be just a tad bit off too.
Also found out the build/paint/finished date of my front bumper was Jan 30, 1982 and my front valence was Sept 4, 1982. Interesting as the ID plate on my door sill says 2/1982.. So I can only come to the conclusion that 2/1982 is when the body was done, and not the trim and other pieces. Hmmm!
.jpg)
.jpg)
.jpg)
.jpg)
.jpg)
.jpg)
.jpg)
.jpg)
.jpg)
Oct 17, 2015
Decided to cut into my 1982 4000 diesel. I had a tree fall on it earlier in the year, and decided I need to get going on scrapping it. I need to use the front "tee" for the urq as mine is damaged from a poor engine removal. To make things easier I just cut the whole front of the diesel off. Then I will be able to create an easy bolt on, bolt off front end. Inspiration from StaleAles car is what is fueling me. Heres my diesel front end.
 And StaleAles car.

Oct 26, 2015
Got the spare parts all sorted out in my garage. I finally have all the pieces to reassemble and get Gobi Hawn running. Only thing missing is a rear parcel/speaker shelf, and I have a lead on one.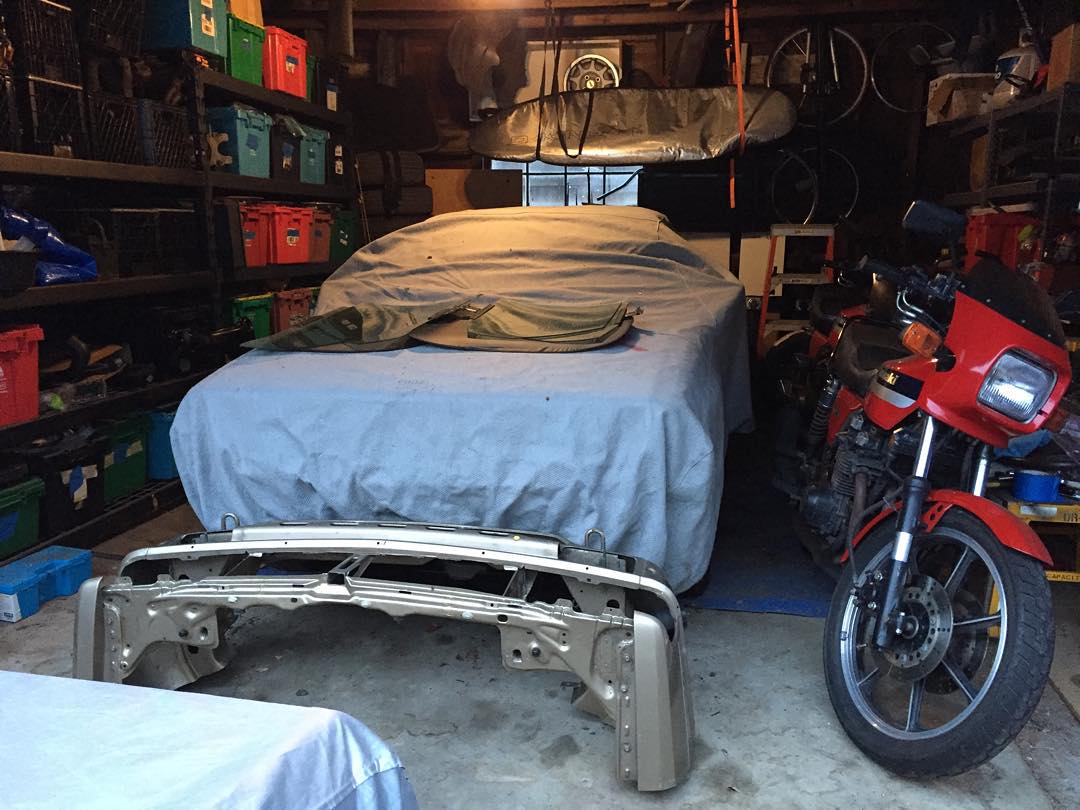
Dec 19, 2015
The weather has been absolutely horrible here lately. Havent gotten squat done on the quat. But after a year of searching I finally found the sunroof trim piece. And its in great shape!
April 9, 2016
Finally the weather cleared up here. Got the car out from under its protective blanket while I was thinning down the stockpile of Fuchs I had. Also had a chance to compare the Gobi Fuch I painted against the Zermatt and Alpine ones.. Crowd is still out on the color. May 28th I should be adding another car to the rotation which means an unexpected increase in urq work. I will be taking the engine and tranny from my mc1 powered 88 5kq and plopping that in the urq. Over the last 2 months ive been working dilligintly to get that engine to peak running condition, and it should provide a nice transplant for the urq. So, I should have a moveable, running urq by the mid to end of June.. Then comes the long task of suspension and sorting out all those bits.. And taking a friend up on his friendly offer to paint the urq in his garage for the cost of paint and beer. :)


April 11, 2016
After some nice weather motivation I got to removing the fenders. Pass side has some frontal damage, but I also wanted to dive in and make sure there was no rust to be found. Outside of a small 1" section on pass side near the strut tower, I am so happy. And that should be an easy fix. Pass Side:


 Drivers Side:


 I also decided to remove the spot welds on the core support so I can transplant over my donor core. I will be making the upper "T" its own seperate unit that is easily unbolted, and also making the horizontal front bar removable. The horizontal bar is a little more challenged as the spot welds near the frame rail are tough to get to, and the tow hooks are involved, but I should have a solution for that in the next few days.
From this to this in 15 minutes once the fenders were removed :)

April 14, 2016
Well what turned out originally to be a day where I didnt get much done, I got a lot done! Removed the lower core with minimal damage to fix.. Kept tow hooks intact. Then I got the engine out and some of the passenger side of the bay emptied of wiring and tubing. Next is the other side of the bay, then jack the car up and remove tranny and subframe. Shortly thereafter, sand and repaint the engine bay.

NOT how you cut a notch in the tranny....


And finished for the day...

April 18, 2016
Today was a day of numbers and dates. First I put together my center console and cubbys and rest of the interior so I could make sure I had everything.. Only thing missing was a mint instrument cluster cover that Im currently trying to find.I did however notice some writing on the back of my center console... 065 USA.. Thats the last few of my VIN! Nice! At least I know the console is original!

I then brought my spare rear seats out in the glorious 90 degree sun we had so I could clean, soak and condition them.. They started to soften up a bit, and will be a good candidate to get crack filled and then a little "dyed" conditioner to darken them up and fill in those spots. Oh, and the lower seat was stamped Feb 25, 1982 :)


July 14, 2016
Long time no update. My 4000 is getting an engine swap with the mc1 from my 5000. Both cars are currently over Josephs (85urq/sepp) house, and I brought my urq fenders over to him to see if maybe the passenger side could be salvaged. He answered my question for me. YES.He noted about 16 dings and dents on each fender, and more impressivly has managed to sort out the front part of the passenger fender with little effort. So all in all ill be able to keep the stock ones!


Dec 1, 2016
Another long time no update. After work last weekend two urq's down in Southern CA I decided I needed to devote some time to mine. After having knee surgery in Sept I am able to start moving around a bit more.This weekend will see a big push. I prepped the empty engine bay to have the subframe and transmission removed as one unit so I can refresh all of that.
Dec 4, 2016
4 days, 3 days of working on the urq! Hot damn!Got the entire front subframe/uprights/tranny off my car in one swoop. We then took the errors and removed the same of Josephs urq, which went 100% smoother


Its nice having a clean, dry space to work on the car. I cant thank Joseph enough for his kindness and friendship. I also took his pic without him knowing! So I expect the car to be light on fire this week by him.

Got most everything apart, and a box made up of stuff to get cleaned, blasted and painted/zinc plated. Also did a little cleaning of 30 year old grime in the engine bay, and itll look even better with a real scrubbing.

Dec 11, 2016
Another extremely productive day. Got my front and rear subframes out (along with Josephs too) and ripped apart. I am going to be running a 4kq subframe/uprights in the rear (with 5ktq front hubs), and a 4kq front subframe with 5ktq uprights in the front. Those will get prepped for coilover conversion soon.But for now, we dropped off 4 subframes and control arms to get tanked and powder coated.


I also had a little time to clean some more. The engine bay got a little more loving. Still lots of grease and dirt to remove.


I also started to clean the wheel wells which I thought were pretty clean, but low and behold they werent. They were completely covered in a 1/4" film of dried dirt. I couldnt believe it. An hour later and I got the drivers side about 50% done. I can see where a lot of hours in the future are going to be spent.


Dec 16, 2016
Had to run to the shop to grab some tools, so spent a little time and dived into the drivers wheel well again.Theres a little triangle (In one of the photos below the pile of dirt and spark plug) that the factor tack welded and seam sealed into the upper corner against the firewall. Ive never noticed this before on the cars, and after finding the amount of crap wedged against the corner because of it, I am almost positve this poor design and the lack of fender covers is the sole reason for the rust issues that plague these cars in that location.
I removed mine as it was only tack welded in two spots, and was greeted by a pile of dirt and a OEM spark plug. Eureka!
Some before.


And after.


Jan 22, 2017
Well some things fell in my lap and I am now going to be installing a 3b in the urq. Made a trip down to CA to pick up a car, and though things didnt go as planned, I ended up with the engine and bits in the back of my truck.

I also stopped at a pick n pull and took the front suspension, control arms and sway bar off a 1994 90 to go two piece for the uprights on the front end.

Quick inspection of the head, and things look normal, which is always good. Engine will be completely rebuilt, 200 20v transmission swapped in, along with 4kq rear diff.

Now, onto the 100's of parts to clean and recondition.. ugh.


Jan 25, 2017
Spent some time cleaning up the gracious space I am being allowed to borrow for the car.
I was then able to unpack the lovely subframes and control arms I got back from the Powdercoater. They did a fantastic job. They look better than new! I cant wait to drop off more stuff there


I then sorted out some uprights to get the old bearings and hubs removed so I can start to figure out what hubs to use for the b4 90 two-piece uprights I want to run.


Feb 04, 2017
For a while I have been measuring and mentally planning to take my replacement front core (from my Gobi 1982 4000 Diesel), and swap it on the urq to replace the damaged core.After much debating internally, I decided to keep the stock lower horizontal piece (there is some slight damage but on the engine side of the frame), mostly because there are some urq specific parts of it that make taking apart a 4k/cgt lower horizontal piece quite difficult to replicate and put onto the urq.
so first I drilled out 14 spot welds from audi and I had the upper piece. Then I removed another 14 spot welds from the old damaged urq upper core from the horizontal lower, and I had a seperate lower piece.
Only thing left is to get some hardware and bolt the two pieces together. Not all of the 14 spot welds line up between the urq and 4k, but enough of them do that I can use the factory positions without having to drill new holes.


Feb 06, 2017
Removed the head off the donor 3b so I could drop it off at the lovely Aluminum Head Rebuilders shop here in Portland so they can make it look better than new.The crank turned over really easily (first lubed the rings/walls with PB blaster). I noticed that three of the pistons rings dont seem to be "scraping the walls" much, so Ill take a look at that once I dive into the block.
However, I can see the cross hatch on all five cylinders, and the headgasket was in fantastic shape, so I am very optimistic.


I also got out my B5 A4 (Girling G57) Brakes and tested them on some Fuchs. I measured the inside diameter against the backside of the hub on the Fuchs and got about 13", where the Ronals showed almost 14". So if they fit on the Fuchs, theyll fit on the Ronals too!
B5 A4 (G57) on top left, 5000 turbo quattro (G60) on bottom left, stock urquattro (G54) on right

B5 A4 (G57) on left, stock urquattro (G54) on right

The B5 A4 have approx 12mm more surface area for braking than the stock urquattro rotors!
B5 A4

5000 turbo quattro

Stock urquattro


Feb 18, 2017
Got my 3b head destined for the urq back from the head rebuilder today.5 bent intake valves, and 6 springs replaced. Handful of lifters shot too.
Good news is that they barely had to skim any metal off the surface.
Up next is the block.
But boy, Aluminum Head Rebuilders in Portland does such a lovely job.


May 09, 2017
Time has gone by fast. Story of my life.Had some time a few days ago to drop off some parts to get powdercoated. 6 uprights, a sway bar, springs, and headlight frames. Take all my money

Also took out the heater/climate box assem to replace the heater core and give things an overall cleaning. Good choice as things were full of leaves and acorns!


July, 2017
More time gone by, less done. SighPicked up Joseph and I's parts from the powder coater.. Yummy


Soaked my door cards in the sun with a ton of lotion on them.. Little by little theyre getting better

Also started to add some noise insulation to the interior. Its pretty thin stuff and wont add too much weight but should solidify the interior a lot


Joseph is nice enough to work on my bumpers and get them repaired and primed for painting. I cant thank him enough

Its fun removing parts off a 35 year old car that have never been removed. This car is so original its great. But there is a lot of dirt from sitting in a field. but no rust!


Also found some more dates from the factory on my bumpers. And a strange "LA" tag.. Perhaps the initials of the worker?


And lastly, got my forged control arms mounted to my powdercoated subframe.

August 1, 2017
Woohoo! Two days in a row!Decided to tackle cleaning and painting my 3B block. Found some minor cylinder lip corrosion on the oil dipstick side of the block, but after talking to some folks with a bit more 3B experiance than I do, I was told it was fine. Also the cross hatching looks EXCELLENT. Few coats of satin engine block paint and I am very happy with the results.


Joseph also started to tackle the stripping and priming of my bumpers for me. Some FRP handiwork for a solid crack I had, and also he found a stamp in the center of my bumper that indicates that perhaps the bumper mould was from Dec 1, 1981. Interesting


I also measured up my 5000 turbo quattro strut housings to confirm my coilover solutions will work. Looks like 4" long and 2.25" ID were the right ones to get.


August 3, 2017
Got a chance to finish clear coating and painting my 3B block. Took some free time and FINALLY cleaned up my stock, untouched rear end. Some wheel and tire cleaner, a brush, and a hose. Amazing to see some of the original factory marks on the bolts, and some sloppy bolt painting too! ;)


August 13, 2017
Received some NOS Koni "Big Reds" and some custom 55mm ID BBSE's from David. Also included a custom upper spacer to sort it all out. I was able to cut up my b4 front uprights (measure 4 times, cut 6 times), and it all worked out. Once I do the other side ill have them welded up tight and then painted.


After avoiding looking at the gas tank, I had the energy to do so. I also opened up the parts CGT and Josephs urq. Directly under the level sender I had an area that initially looked like a lot of rust, but after taking some photos of other angles of the tank, and then scraping the suspected area, its mostly all just some buildup (probably due to how the car was sitting in a yard for so long, and the fuel/sediment settling out). I will clean up the tank in a few weeks and flush it. Interesting to note is that I do not have the "sock" on the inlet tube that most do. Joseph does on his 85 quattro. My car has 100% never been messed with either. All in all, extremely happy for a car that hasnt run in almost 25 years.


August 27, 2017
Joseph got busy on my fenders.. Everytime I come to the shop hes done a little bit more. Cant thank him enough!


September 1, 2017
Finished up my mockup of the front b4 two piece coilovers. Only welding left to do.

Started to assess the damage on my floor. Someone had clearly used the wrong spot of the car with a floor jack or post lift. Not pictured I stripped all the paint back and we will straighten the floor out and weld up the 2" long split in the metal.


I also tackled some light surface rust from what appears to be a leaking battery at some point in time. Took everything down to bare metal, flattened the battery box floor (wonder if its the same floor jack that got used), and used some POR15 on areas that I couldnt strip the metal. Next will be primer then shooting everything with some Gobi.


Moving over to my front core support..... Its going to be removable so I started to work on the lower horizontal support. Lined everything up and made sure all my measurements were good and i cut out some areas that had damage from when I was removing the spot welds. I am going to use some 1/4" metal and make some supports that get welded to the core and then is bolted to the frame using the European bumper bracket holes. Im confident itll be stiffer than the stock spot welds, and will allow me to rest easy when the engine is running and the snub mount is bouncing around.


Finally got my urs4 front hubs back from the machine shop. I had them take a 10mm x 10mm notch from the edges (probably could have gone 7mm). Heres some photos comparing different hubs.


September 27, 2017
Finished up the battery box area repainting. Quite happy with the results!


Decided to clean up where the fender meets the firewall. Plan is to chassis black the front facing areas, then prime, sand and gobi the rest. I trimmed back some of the sealant, and will reapply some new undercoating to the lower areas and make everything look nice and smooth. My fenders wont be using the heavy duty epoxy to seal things when they go back on, so I am going to try and keep things nice and clean.
Drivers side before


Lastly, I finished pounding down the floor, and flattening the 2" long split in the floor so we could weld it up and then apply some primer and undercoating. It doesnt look perfect on the inside, but its very close to the original. And going to be covered in sound proofing, insulation and carpeting.


September 29, 2017
Another day another thing to clean. This car has an incredible amount of dried dirt on the underside and wheel wells. I had to have driven offroad, or from sitting in a field for a few years, the ran splashed up mud and it got in every nook and cranny. I spent a few hours testing out a new air powered water nozzle. Its no wonder the cars rust out where the wings meet the firewall. They did an amazingly sloppy job with sealant, and leave a ton of cavities for water and salt to just sit.
Drivers front side (I had already spent time in here with a brush and bucket of water. Now after blasting out the nooks and crannies I am ready to apply undercoating in a more OCD fashion than the factory did)


Passenger front side (first time cleaning)


Driver rear side (took about 2 hours to get just that one spot clean. Gonna have to break out the chemicals for this one.)


October 1, 2017
Got a chance to finish an "initial cleaning" of all my wheel wells. Crazy the amount of dried dirt. Cant wait to wheel it outside and powerwash it.


Also, Joe finished up welding the seam in my floor. I then applied some primer and undercoating.


And after getting the rings for the coilover sleeves to sit on, I finished up the front coilovers and painted them with epoxy paint. Test fitting the spare springs I had laying around and I will need to go longer for sure. An approx measurement against the stock setup, and I think I will need to go 11" to have the coilover ring sit in the middle of its adjustability range. I have some springs and tenders coming that should bring the length together to about 10" so I think I will run with that and see how it works.


And lastly Joe and I ran to the local Pick n Pull. I wanted to get some B5 rear hubs (but forgot the massive allen socket for the axle bolt), and Joe was after a BMW E30 sunroof. He had success. I managed to snag a B4 passat spare tire tool insert which fit very nicely into the stock urq spare tire.


November 10, 2017
After much delay (on my end), I finally got my modified urS hubs installed into the b4 knuckles. I have some offset issues with the caliper brackets and rotors (Same issue with G54, G60 and G57 brackets), but once I modify the caliper bracket (easiest solution first), itll all be sorted out.


In all the years of owning b2's, I had never seen strut hats like these. Goes to show how odd the urq's were. This is off Joes 85 urq. Now i gotta find another set!


Not happy with the factory undercoating coverage when I started to clean the car, I finally got about doing the drivers front wheel well. After a few heavy cleaning sessions I was happy with how clean it was, and I applied 3 layers of 3M undercoating. Very very very happy with how it came out!
November 17, 2017
Had a few free hours so I tackled some things on the car that were bothering me.
First I was really happy with how my wheel wells turned out after drying. I bought a 6 pack of the 3M undercoating (Part #03584) straight away to do the rest of the car. I used one can on just this one wheel well.


I also found a paper sticker that I couldnt believe appears to be original. Its paper, without any sort of coating over it. I am shocked that its still alive. One would think 2 or 3 washes and it would be gone.


Moving on to the drivers fender, I wanted to assess some surface rust I had seen. I always hoped it wasnt much, and it wasnt too bad (worse than I hoped), but after cleaning it up, and then treating it with some excellent primer (for now), I can at least rest easy. Once I get things on the car done to where its going to go on the road, I am going to address this, and some other paint issues.


On the topic of rust, I found an odd weld under the passenger side of the rear seat. It was clearly factory created (due to the paint around it being original), and I compared it with Joes urq and a CGT and couldnt find that same spot. Odd. Regardless, it cleaned up well, and was primed and painted.


After spending 2 hours cleaning some of the old cloth insulation off the floor, I fixed a few more dents in the floor (someone didnt know how to use a floor jack). I then applied some tar backed noise/heat insulation, and will top with some jute insulation in the near future. I was very tempted to clean up the floors and make them sparkly mint, but its pointless. I can live with the black touchup paint that the PO put down on areas where he saw bare metal.


And finally, I got my rear uprights all finished up.

The Cars History: (prior to my ownership)
1982
According to records from Audi of America, my car was finished on the production line March 26, 1982. The body appears to have been finished Feb 1982 (door jamb sticker). It entered customs on June 8, 1982, and was dropped off at dealer A26 (Colley Porsche in Riverside, CA) on June 15, 1982.2007
Car is listed on eBay. Here are some pics from its listing.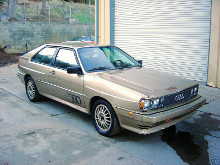
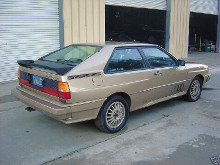
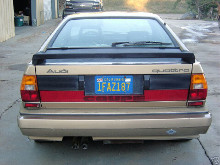
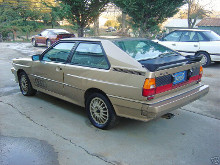
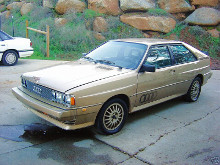
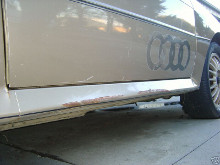
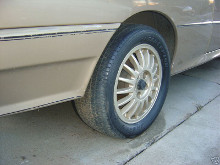
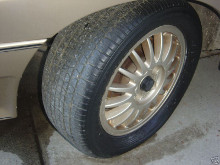
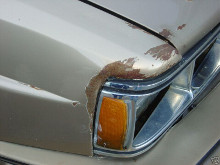
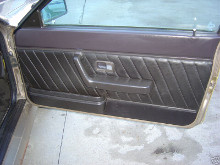
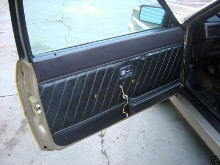
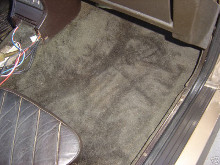
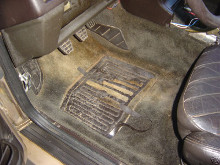
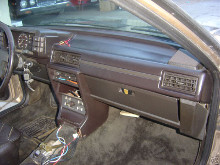
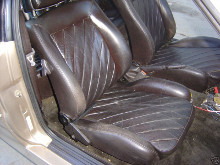
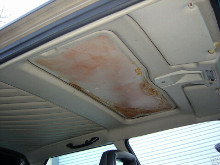
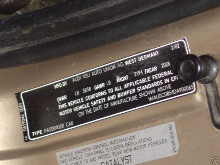
April 28, 2008
Car is listed on Craigslist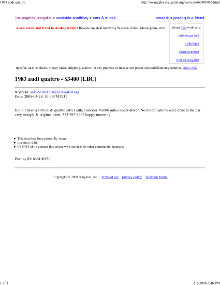
May, 2008
Found a few postings from a previous owner

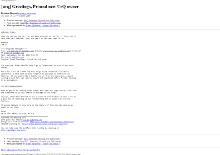

Some pictures taken in May 2008 from the owner.
May 6, 2008
.jpg)
.jpg)
.jpg)
.jpg)
.jpg)
.jpg)
.jpg)
.jpg)
.jpg)
.jpg)
.jpg)
.jpg)
.jpg)
.jpg)
.jpg)
.jpg)
.jpg)
.jpg)
.jpg)
.jpg)
.jpg)
.jpg)
.jpg)
May 8, 2008
Carfax is pulled on the car
Some more pictures are taken
.jpg)
.jpg)
.jpg)
.jpg)
.jpg)
.jpg)
.jpg)
.jpg)
.jpg)
.jpg)
.jpg)
.jpg)
.jpg)
.jpg)
.jpg)
.jpg)
.jpg)
.jpg)
.jpg)
May 10, 2008
Some more photos are taken.jpg)
.jpg)
.jpg)
.jpg)
.jpg)
.jpg)
.jpg)
.jpg)
.jpg)
.jpg)
.jpg)
May 11, 2008
The car arrives to the new ownerMay 13, 2008
The owner found the keys!
May 15, 2008
Interior was assessed, cleaned, ripped apart, and looked at. Oh, look at that, .62 cents and a .22LR bullet..jpg)
.jpg)
.jpg)
.jpg)
.jpg)
.jpg)
.jpg)
.jpg)
.jpg)
.jpg)
.jpg)
.jpg)
.jpg)
.jpg)
June 20, 2009
Previous owner gives a little history on the car.
Sept 15, 2009
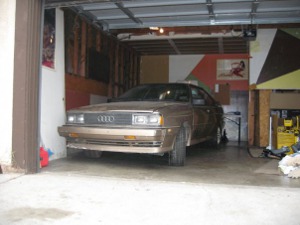
Owner snapped a pic
April 1, 2010
Car was posted on Bring a Trailer .
In case the page doesnt load, here is an image of the original posting

April 25, 2010
New owner posts some info and pics.
Feb, 2015
Received photos from the previous owner.